Wednesday, October 8, 2014

DIY #Scandal Wine Glass

The season premiere of the hit ABC show "Scandal" starring the talented and fabulous, Kerry Washington, aired September 25th. My mom and I absolutely LOVE this show and wanted to do 
something fun to celebrate the new season of scandalous events to come. 

What better way to celebrate than to create custom wine glasses that even Olivia Pope 
herself would love?!?

Materials Needed:
- One wine glass
- E6000 glue
- Glass paint (I used the Martha Stewart brand since it is so good. Plus, there's a million colors to choose from with her brand!)
- White vinegar
- Rhinestones & knick knacks to decorate with

Also:
- Blue painters tape
- Paint brushes
- Paper towels
- Nail polish remover

Step 1: Wash the glass well with soap and water.

Step 2: Clean surface of the glass with white vinegar or rubbing alcohol with a paper towel. Allow to dry completely for the best results.


Step 3: Paint!

I taped a 1" around the rim, or however large and in charge your lips are, with Blue Painters tape.  My painting tool of choice was a paint brush, but you can use a sponge or whatever you can imagine to use!

For an allover easy look, start the first coat by painting the base and continue up the stem and finish at the top where the brush meets the blue tape.

Repeat until desired look. I achieved this opaque Pewter color with at least two coats.

NOTE: If you mess up at all, try nail polish remover and Q-Tips ;)


Step 4: Set oven to 350 degrees.

Don't preheat the oven too early, it is best that you set the oven and put the glasses in at the same time. This allows the glasses to gradually heat up and not crack under the pressure!

For this design, position the glasses upside down on top of a cookie sheet lined with aluminum foil.

Step 5: Allow to "cook" for 20 minutes. Turn the heat off and leave the glasses in the oven for another 10 min.

Step 6: Decorate!

I was battling between two of my favorite #Scandal quotes:
1) "Consider it Handled"
2) "How Presidential are my Balls Now?"

As much as I wanted to use "presidential balls", I didn't have the patience nor enough letters :/

Next, I got creative and glued some decorative scrapbook rhinestones with transparent E6000 (Apparently they sell E6000 that dries white and even black! Don't make that mistake).


Hope this DIY is as fun for you as it was for my mom and I!


Monday, August 18, 2014

College Graduation Party


College is over and I finally graduated with my Baccalaureate degree from 
the best university in Texas ;) Now, to plan the party for a proper celebration. 
Most parents, like mine, think its easier to go to a nice restaurant and have an easy lunch, but not me!
I thought it would be so much more personal to celebrate my maroon and gold victory
by hosting a good ole' fashion graduation party.


<<< To the left: the fajita buffet table <<<
featuring my cap and accompanied 
with DIY cowboy boot centerpieces 
(post coming soon!)

>>> To the right is the drink table >>>>
 with festive appetizers  


The Gift Table featured: my degree holder, sweets, DIY Card Box (post coming soon!) 
and Cowboy boot center piece.
Everyone loves cookie cake and cake pops.... why not have both!
My younger sister even had the book on the bottom left corner made for me of my graduation pictures for attendees to write sweet messages inside


This is the San Marcos Square in downtown outside of the venue/ the LBJ Museum where I worked.
I made a wish on them as I let them all go. 

Monday, August 11, 2014

Easy Broccoli Salad Recipe


This sweet summer delight is one of my favorite vegetable side dishes.  
Its even better as a fresh snack on a hot sunny day.
And it's really easy to make!

Prep Time: 15-20 minutes
Serving: 4-5 people 


Ingredients:
- Economy sized bag of fresh, clean broccoli
- Whole cashews
- Cranraisins
- Box of fully cooked bacon strips
- Red onion
- Apple cider vinegar
- Hellman's mayo
- Shredded Mild Cheddar
- Sugar


Step 1: Chop raw broccoli into bite-sized pieces to equal about 4 cups


Step 2: Mince a quarter of the red onion


Step 3: Cut 4 strips of cooked bacon into smaller pieces
Step 4: Combine all of the broccoli, bacon, red onion including 1/2 cup of whole cashews and 1/2 cup of Cranraisins into a mixing bowl
Step 5: Create the dressing

Combine 1 cup of Hellman's mayo with 1/3 cup of sugar and 2 tablespoons of apple cider vinegar into a separate mixing bowl


Mix ingredients until becomes a creamy thick concoction. It should look like this.
Final Step:
Combine the dressing into the bowl and sprinkle as much or as little shredded cheese in the mix.

Mix everything and refrigerate until ready to be served.

Monday, July 21, 2014

Mayor Guerrero of San Marcos celebrates 50 years


"Fifty years ago, a Bobcat changed the world with a stroke of a pen."

On July 2, 1964 President Lyndon B. Johnson, Texas Southern graduate (now Texas State), signed the Civil Rights Act of 1964, for those of you who do not know, this outlawed discrimination based on race, color, religion, sex or national origin. 


The LBJ Museum of San Marcos welcomed the city to celebrate in the signing of the Civil Rights Act of 1964 by showing a special viewing of President Lyndon B. Johnson's speech addressing the nation before he signed the act into law. 

It's been 50 years after the day and the words of President LBJ still rang true. The room was packed, mixed with about 50 patrons from all walks of life and color; which I find ironic. 

San Marcos Mayor, Daniel Guerrero, addressed the museum, proclaiming, July 2nd, as "Civil Rights Day" in San Marcos, Texas at the LBJ Museum. 


Proudly representing his Alma Mater, Texas State University, the mayor followed the ceremony with a short story, a personal favorite of his about President LBJ.  

It starts out with, "LBJ in the situation room surrounded by generals, admirals, graduates from Princeton, the Naval Academy and all points in between. And the president says, 'You know, you guys might have lots of stars and stripes, but this decision rests firmly on the shoulders of a graduate from Southwest Texas Teacher's College.'" 

The crowd laughs with pride as the mayor claimed he could be wrong in some detail, but if it is an accurate story, he says that he thinks it showed LBJ's pride for his school and for Texas. 


PARTY DECORATIONS:


<<< Welcome Tables >>>
Including:
Programs
Copies of BobcatFans Magazine
Donation Bucket
Plan Board of future plans to update the museum's 2nd floor for more exhibits!


<<< Hors d'oeuvre Table >>>
Decorated in black&white with a touch of gold, which I thought was appropriate for the event. 
Including:
veggie tray
fruit tray
turkey wrap tray
sweet/ unsweet tea


We thank the local HEB for its donations 

Simple black table clothes, white plates with red napkins, black and white balloons with red string and gold tinsel were used to make the table festive, but not a main attraction. 


SJMC Blog Post About Me

Leah Keyworth posed in the LBJ Museum of San Marcos
Photo credit: Brenda Brantley

Stumbled across this post from Texas State University's SJMC Blog contributed by Brenda Brantley, a former classmate. Read all about me in the article titled,
Father's MS Challenge Inspires a PR Purpose. 

Monday, June 16, 2014

How To: Make Vows Wall Art

Since I hate buying wedding gifts from registries I decided to make my friends something that they would cherish, their wedding vows as art. My best friend, Josh, got married on June 6, 2014. Just days beforehand I asked both he and his bride-to-be to send me their vows. 

What you'll need:
- two 8x11" pieces of parchment paper
- scotch tape
- lighter
- decorative accents
- E6000
- Canvas
- Colored paint pen


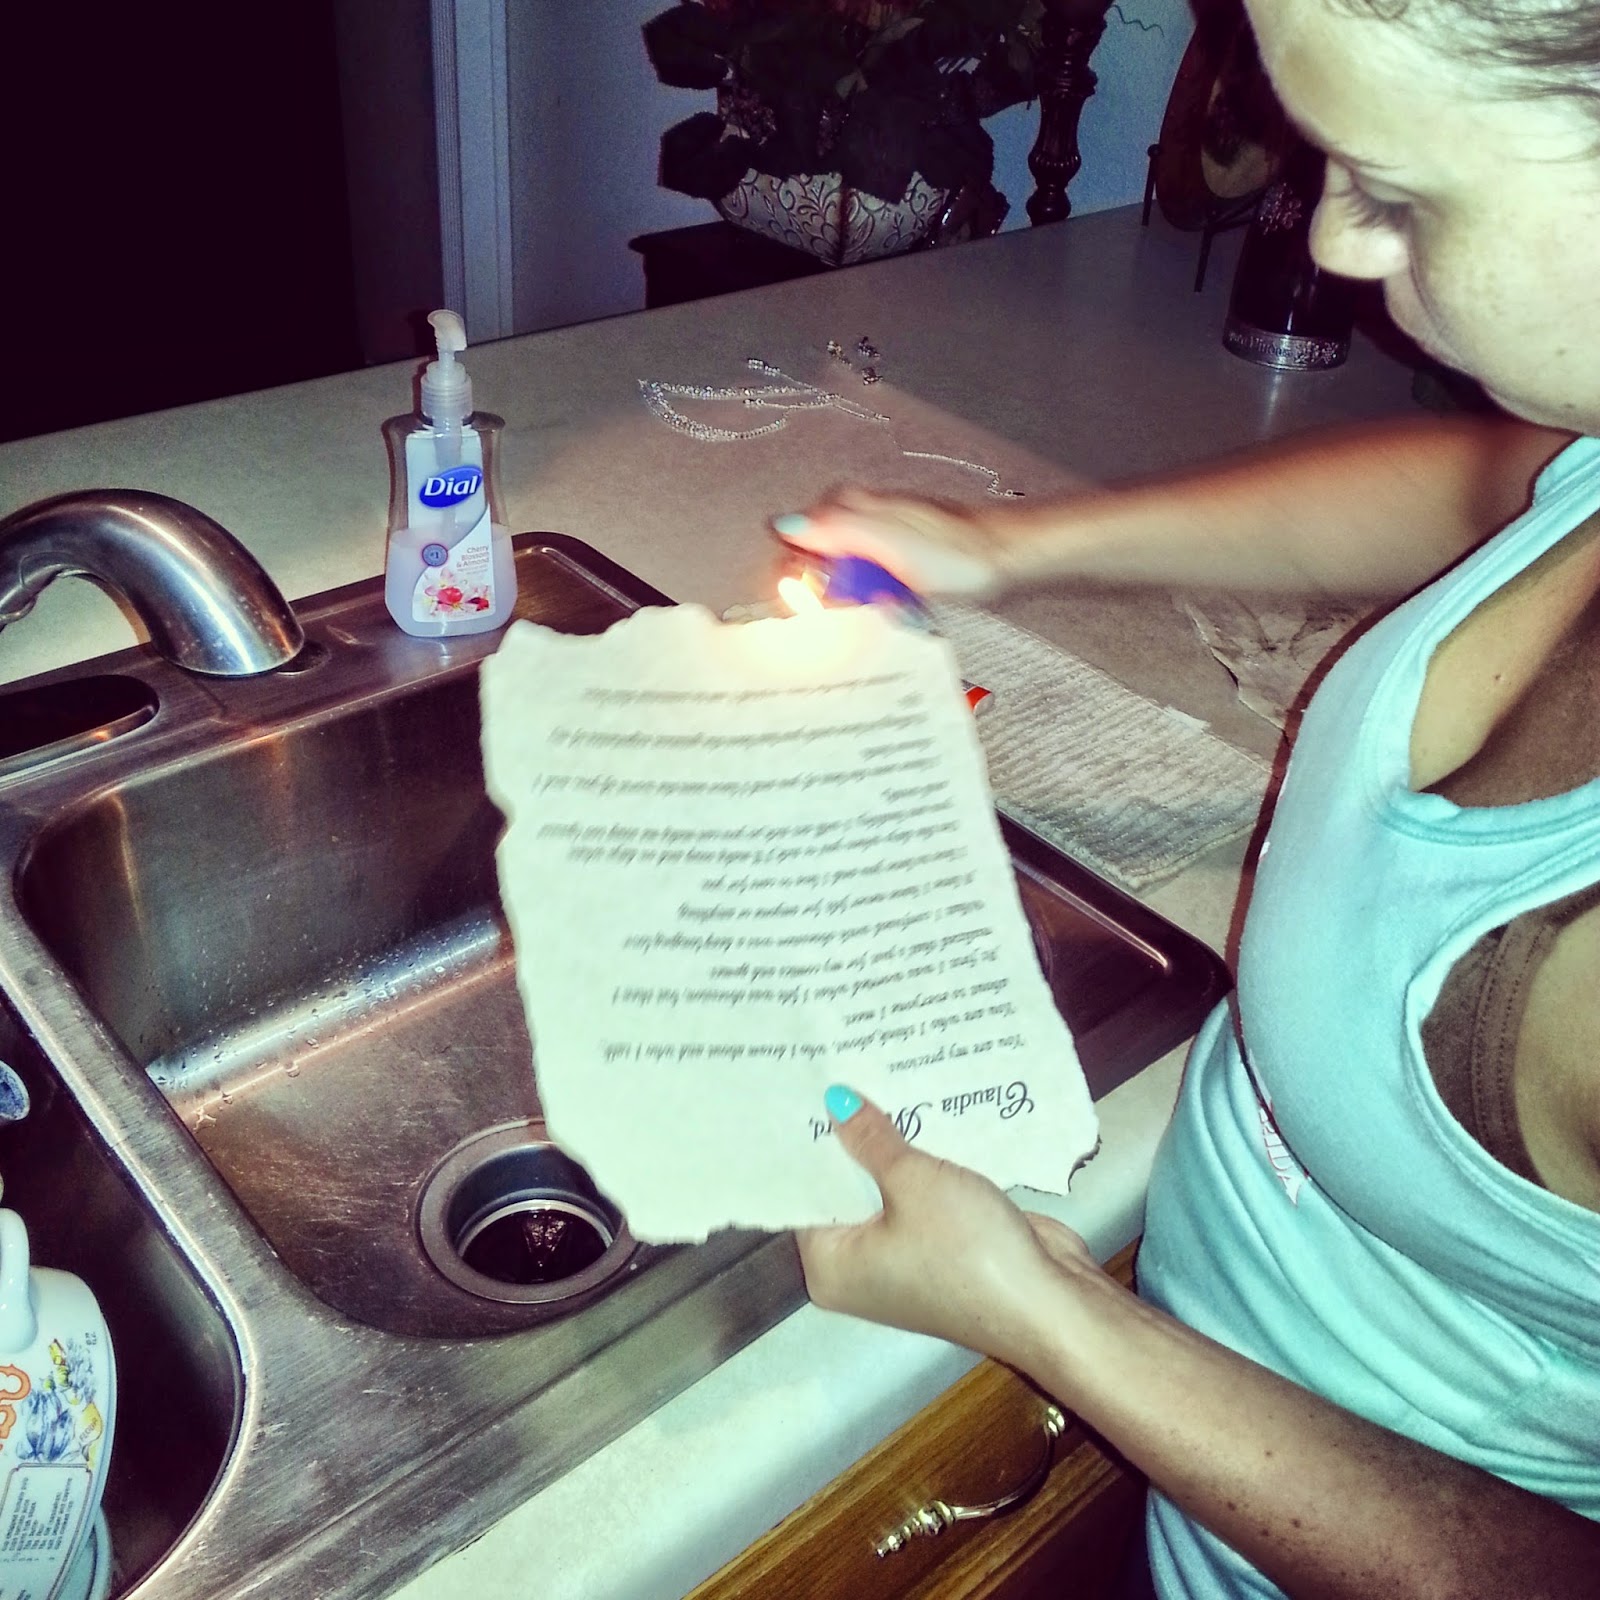
I typed both the bride and groom's vows, each on a piece of 8x11" parchment paper. 
With each sentence I started a new indention, so it would be easier to read. 
Lightly burning all the edges by dragging the flame to the desired look. 


When I first tried gluing the finished parchment to the canvas, the glue bled through and was visible. So, I taped the back of the parchment with scotch tape and put the glue on only that part. 
Be sure to not put to much so that it doesn't bleed over the scotch tape areas. 


The decorative canvas was found at Hobby Lobby for about $8 each including the decorative flowers. I picked flowers that resembled the colors of the wedding. 
Using the paint pen, I wrote out the wedding date that matched the flowers.
Allow to dry overnight.


Thursday, April 10, 2014

How To: Chevron Graduation Cap


I am graduating from Texas State University-San Marcos this May and although graduation can be a bit stressful, make it fun by decorating your cap with ease and creativity!

Follow the instructions to make what I created and feel free to comment questions or suggestions! 


Materials Needed:                                              
- three 12' x 12' pages (maroon, gold glitter and taupe)                                                                  
- cardboard box to make cuts                              
- scissors                                                              
- exacto knife ($2 at Hobby Lobby)                        
- E6000 glue                                                          
- measuring tape
- graduation cap

Cut 9.5' x 9.5' square for your background and a circle about 3/4' in diameter to use as a stencil.
The center is 4.75' into the middle of the height and length of the square.

Draw a circle in the center where your cap knob will be using that 3/4' circle stencil

Cut one line down the middle to the center where your cap knob would be. Using your exacto knife, cut out that tiny circle in the middle.

Apply E6000 along the area of the cap and the edges to glue down your background page.
Careful not to tear the page, fit the paper on top of the cap for a perfect fit!


Draw chevron cut outs on the back of the glitter paper.I used a stencil that I found and printed out from:

Using the "Small-Thin" size chevron stencil I marked with a pencil on the whole 12' x 12' page


Proceed to cut out using an exacto knife, trust me it's well-worth buying!

Before gluing any strips of glitter down, first align them on the cap the way you like.

Make sure the chevron tips are all facing the same direction. 

Also make sure the chevron is going to face the correct direction. 

(I accidentally glued everything sideways. LOL.)
NOTICE: One the chevron strips goes over the center knob where you tassel will be around. 

After you have decided where your strip will be placed, make note of where the center knob is on that strip. 

Using your circle stencil we cut out earlier, make a cut with your exact knife to fit in place. 


We don't want a black center knob showing in the middle of your beautiful cap! 

Use the same circle stencil and cut out another circle of the glitter paper to glue on top. 


You can find letters at any craft store, but if you want to personalize it even more or save a few 
buck$ you can create your own! 

I just drew bubble letters of what I wanted it look & fit best on the other sheet of colored paper. 

Cut each letter individually using your exact knife. 

(This took about 30 minutes to complete)

Glue the letters down to your liking. 
Even if you end up buying letters, make sure to glue them on with the E6000 to be safe. 

No ones got time for that!

I didn't plan on rhinestoning the letters until the last minute, but I ended up buying for 72 count packages of small packages of small crystal rhinestones at Hobby Lobby for $2.99 each. 

Rhinestoning can be tedious & seem like it takes forever! 

My strategy is to apply a strip of E6000 on the letter, and use a pair of tweezers to pickup and place the rhinestones with ease.